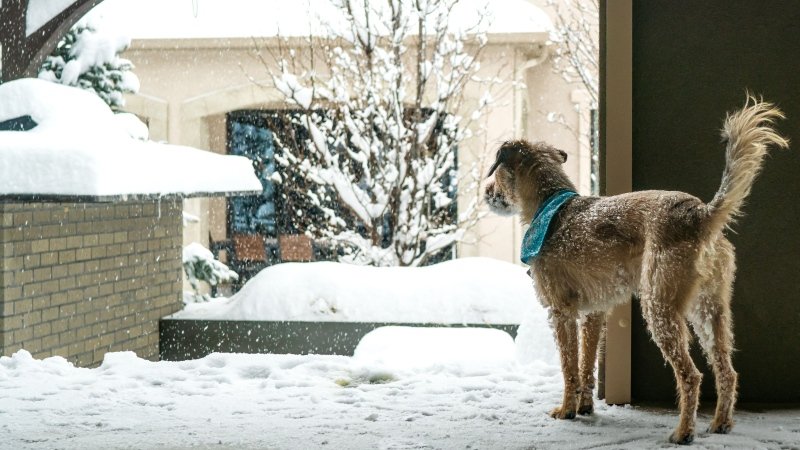
Build a budget-friendly DIY dog house for winter to keep your furry friend warm and safe during the colder months. Discover an easy guide to building a cozy dog house that will provide insulation and protection from the frost.

Credit: thehill.com
Benefits Of A Diy Dog House
Build a cozy and budget-friendly DIY dog house for winter to keep your furry friend warm and safe. Discover this easy guide and beat the frost with a homemade shelter for your pet.
Cost Savings
Building a DIY dog house can save you a significant amount of money compared to purchasing a pre-made one. In addition to the cost of the materials being lower, you also have control over where you source the materials from, allowing you to find the best deals. By opting for a budget-friendly DIY approach, you can allocate the saved funds towards other essential pet supplies or activities for your furry friend.
Customization Options
One of the major advantages of building your own dog house is the freedom to customize it according to your dog’s needs and your personal preferences. You can tailor the design, size, and features of the dog house to perfectly fit your dog’s size, breed, and habits. Whether it’s adding extra insulation, adjustable ventilation, or even a built-in feeding station, the possibilities are endless. This customization ensures that your dog is comfortable and safe, while also creating a unique and personalized space for them.
Satisfaction Of Building It Yourself
The satisfaction of building something with your own hands and seeing the end result is incomparable. Building a DIY dog house allows you to take pride in your craftsmanship and gives you a sense of accomplishment. It also provides an opportunity to bond with your furry friend as you involve them in the process, whether by choosing colors, testing out the space, or even helping with minor tasks. The satisfaction extends beyond the completion of the project, as you witness your dog enjoying their new cozy and warm home.

Credit: www.westernslopenow.com
Materials And Tools Needed
Build a cozy and budget-friendly DIY dog house for winter with this easy guide. Keep your furry friend warm and safe during the frosty season.
Insulation Materials
When it comes to insulating your DIY dog house for winter, there are several materials you can choose from:
- Pet-safe caulk: Use this to fill any gaps and prevent chilly drafts from coming in.
- Foam board: This is an excellent option for insulating the walls, floor, and ceiling of the dog house.
- Aluminum foil bubble insulation: This reflective material helps to trap heat and keep the interior warm.
- Rolls of fiberglass insulation: Fiberglass is a popular choice for its excellent insulating properties.
Weatherproofing Materials
To ensure your DIY dog house is well-protected from the elements, you’ll need the following materials:
- Weatherproof caulk: Use this to seal any gaps or seams and prevent rain or snow from entering.
- Waterproof paint or sealant: Apply a coat of waterproof paint or sealant to protect the exterior of the dog house.
- Rubber or plastic flaps: These can be attached to the entrance of the dog house to keep wind and rain out.
Basic Tools
Here are some basic tools you’ll need for building your DIY dog house:
- Tape measure: Use a tape measure to ensure accurate measurements for the various components of the dog house.
- Saw: You’ll need a saw to cut wood or other materials to the desired size.
- Hammer: A hammer will come in handy for attaching nails or other fasteners.
- Screwdriver: Use a screwdriver to tighten screws or assemble various parts of the dog house.
- Drill: If you plan on using screws, a drill will make the process much easier and faster.
Step-by-step Guide To Building A Diy Dog House
Building a DIY dog house for winter doesn’t have to break the bank. With some basic tools and materials, you can create a cozy and budget-friendly shelter for your furry friend. In this step-by-step guide, we’ll walk you through the process of building a DIY dog house, ensuring your pup stays warm and protected during the frosty winter months.
Preparing The Foundation
Before you start building the dog house, it’s important to prepare a solid foundation. Choose a level spot in your backyard and mark the corners of the dog house with stakes. Clear any debris or grass from the area and dig shallow holes for the foundation.
- Ensure the holes are deep enough to anchor the dog house securely.
- Place concrete blocks or paving stones in each hole for stability.
- Use a level to ensure the blocks or stones are flush with the ground.
- If necessary, adjust the height of the blocks or stones to achieve a level surface.
Building The Frame
Now that you have a stable foundation, it’s time to build the frame of the dog house. The frame will provide the structure and support for the rest of the construction.
- Measure and cut the lumber according to your desired dimensions.
- Assemble the walls by securing the pieces together with screws.
- Attach the walls to the foundation using brackets or nails.
- Secure the roof supports to the top of the walls.
Adding Insulation And Weatherproofing
To ensure your dog stays warm and protected from the elements, it’s crucial to add insulation and weatherproof the dog house.
- Line the walls, floor, and ceiling with insulation material such as foam board or rolls of fiberglass insulation.
- Seal any gaps or cracks with pet-safe caulk.
- Apply weatherproof sealant to the exterior of the dog house.
- Consider using aluminum foil bubble insulation for added warmth.
Constructing The Roof
The roof is an important component of the dog house as it provides additional protection from rain, snow, and wind.
- Cut the roofing material to fit the dimensions of the roof.
- Secure the roofing material to the roof supports using nails or screws.
- Ensure there are no gaps or holes in the roof to prevent leaks.
- Apply a layer of weatherproof sealant to the roof for added protection.
Finishing Touches
With the main structure and roof complete, it’s time to add the finishing touches to make the dog house cozy and comfortable for your furry friend.
- Add a soft and warm bedding material for your dog to lay on.
- Install a door or flap to keep out drafts.
- Consider adding a window for additional ventilation and natural light.
- Paint or stain the exterior of the dog house to protect it from the elements.
Tips For Winterizing The Dog House
When the chilly winter months arrive, it’s important to make sure your furry friend has a cozy and warm place to retreat to. Winterizing the dog house is essential to protect your pet from the harsh weather and keep them comfortable throughout the season. Here are some useful tips to help you winterize your dog’s house:
Using Pet-safe Caulk
One of the first steps in winterizing your dog house is to make sure there are no gaps or cracks that cold air can seep through. Use pet-safe caulk to seal any openings, ensuring that your dog house is well-insulated and draft-free. This will not only keep your pet warm but also prevent any moisture from entering the house.
Insulating The Floor, Walls, And Ceiling
Proper insulation is crucial to maintain a warm and cozy environment inside the dog house. You can use a variety of insulation materials such as foam board, aluminum foil bubble insulation, or rolls of fiberglass insulation. Line the floor, walls, and ceiling of the dog house with these materials to provide an extra layer of protection against the cold outdoor temperatures.
Using Long Stem Grass Hay For Warmth
The most cost-effective way to keep your dog house warm is by using long stem grass hay. Place multiple layers of hay on the floor of the dog house to create a cozy and insulated sleeping area for your pet. Remember to change the hay every two days or so to maintain cleanliness and ensure your dog’s health.
Regular Maintenance
Don’t forget to regularly inspect and maintain your dog house throughout the winter season. Check for any signs of damage or wear and tear, and promptly fix any issues. Clean the dog house regularly to remove any dirt, debris, or moisture that may accumulate. This will help ensure that your pet’s house remains a comfortable and safe haven even during the harshest winter conditions.
Credit: petpress.net
Frequently Asked Questions Of Beat The Frost: Budget-friendly Diy Dog House For Winter
How Do I Make My Dog House Winter Proof?
To winter-proof your dog house, use insulation products like pet-safe caulk, foam board, aluminum foil bubble insulation, or fiberglass insulation. Line the floor, walls, and ceiling with these materials. For warmth, use long stem grass hay as it is economical and helps maintain temperature.
Change it every two days for cleanliness.
What Is The Best Thing To Put In A Dog House For Warmth?
To keep a dog house warm, the best thing to use is long stem grass hay. Layer the hay on the floor of the dog house to provide insulation and warmth. Remember to change the hay every two days to maintain cleanliness and your dog’s health.
What Is The Best Insulation For A Dog House?
The best insulation for a dog house includes pet-safe caulk for gaps and foam board, aluminum foil bubble insulation, or rolls of fiberglass insulation for the floor, walls, and ceiling.
How Warm Is An Insulated Dog House?
An insulated dog house is warm enough to keep your dog comfortable during winter.
Conclusion
Keep your furry friend warm and safe this winter by building a cozy and budget-friendly DIY dog house. Using traditional home insulation products, such as pet-safe caulk and insulation materials, you can easily create a winter-proof shelter for your pup.
Additionally, lining the floor with long stem grass hay will provide extra warmth. Don’t let the frost get to your furry companion – give them a comfortable and insulated space to stay cozy during the colder months.